Vim - A Shining Hill ... But A Steep One
Get started learning Vim's keybindings to use Vim.
Introduction #
Vim endures as a difficult but powerful text editor.
The keybindings, though unintuitive, are a staple on any IDE or text editor with
plugins.
Ever since their inception in the vi text editor, the Vim keybindings have
shaped the software development landscape for decades.
This tutorial will help you get started using Vim and understand how Vim works. You will learn how to install Vim and open, edit, save, and close a file.
Requirements #
- A terminal application
- Windows Terminal on Windows
- iTerm2 on OS X
- xterm on Linux
Getting Started #
Vim might come pre-installed on your operating system. To check in Vim is available, open a terminal application and run the following command:
$ vim -h
VIM - Vi IMproved 9.1 (2024 Jan 02, ...
...
If the command returns an error unlike the output above, install Vim.
Windows #
To install Vim on Windows,
- Download the installer from a release from this list.
- Run the installer.
Author Recommends
I recommend installing a stable release to avoid potential installation issues. You can install v9.0 from this release.
OS X #
To install Vim on OS X,
- Open a terminal application (e.g. iTerm2)
- Install Homebrew using the command listed on the home page.
- Run
brew install vimin a terminal.
Read the official instructions for OS X here.
Linux #
Author Recommends
This tutorial will detail how to install Vim from a package manager and from the source code.
I recommend to use the asdf version manager and install Vim as a
plugin.
See this tutorial to learn how to install asdf.
Package Manager #
Below are commands needed to install Vim using different package managers on different distributions of Linux:
Arch/Manjaro
sudo pacman -S vimDebian/Ubuntu
sudo apt install vimOther Linux Distributions
To install Vim on other distributions of Linux, use the search function for your
preferred Linux distro to search the package repositories for vim.
Install From Source #
- Open a terminal application (e.g. xterm).
- Clone this repo in a terminal.
- Use this command:
git clone https://github.com/vim/vim
- Use this command:
- Change the current working directory to that of the git repo.
- Use this command:
cd vim
- Use this command:
- Run
make - Run
sudo make install.
Read the official installation instructions here.
Open Vim #
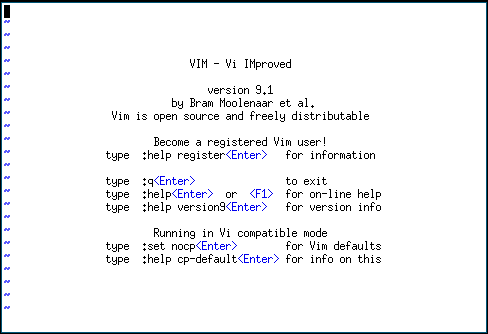
To open Vim, open a terminal application.
Run vim in the terminal.
$ vimThis will start Vim in the terminal. The screen should look like this:
How Vim Works
Vim is a modal text editor.
Vim begins in "Normal" mode. To edit text, switch to "Insert" mode. Other modes include "Command", "Replace", and "Visual" modes.
Read more about the history of modal text editors from ed to neovim in
this article by Carlos Becker.
Edit Text #
To edit text, enter Insert mode and press i.
The bottom of the window should show the mode as such:

Type the text to add to the file. For example, "text file". The top of the screen should look like this:

Save File #
To save the file, type <ESC> to return to Normal mode.
To write a file, enter the following command in Normal mode:
:write [FILE]This command will:
- Enter Command mode with
: - Specify the
writecommand (orwfor short) - Specify the file to be written to as
[FILE] - Execute the command with
<CR>
For example, :write file.txt writes the buffer to a file named file.txt.
If you do, the bottom of the screen should look like this:

Vim will return to Normal mode after you enter the write command.
Opening a file
To open a file in Vim, run Vim in the following way with [FILE] as the file
you want to open.
$ vim [FILE]If you open a file with Vim, you don't need to use the write command to write
to a specific file.
You can use the write (or w) command on its own to write to the opened file,
like this:
:writeQuit Vim #
To quit Vim, return to Normal mode and enter the following command:
:quitConclusion #
The Vim keybindings need a while to learn, but will help you improve your text-editing workflow. The keybindings appear in other text editors and IDEs and provide developers an upgraded text-editing language to leverage. In the following tutorials, you'll learn how to harness the full power of Vim to enhance your development and text-editing workflow.
License #
This work is licensed under CC BY 4.0.